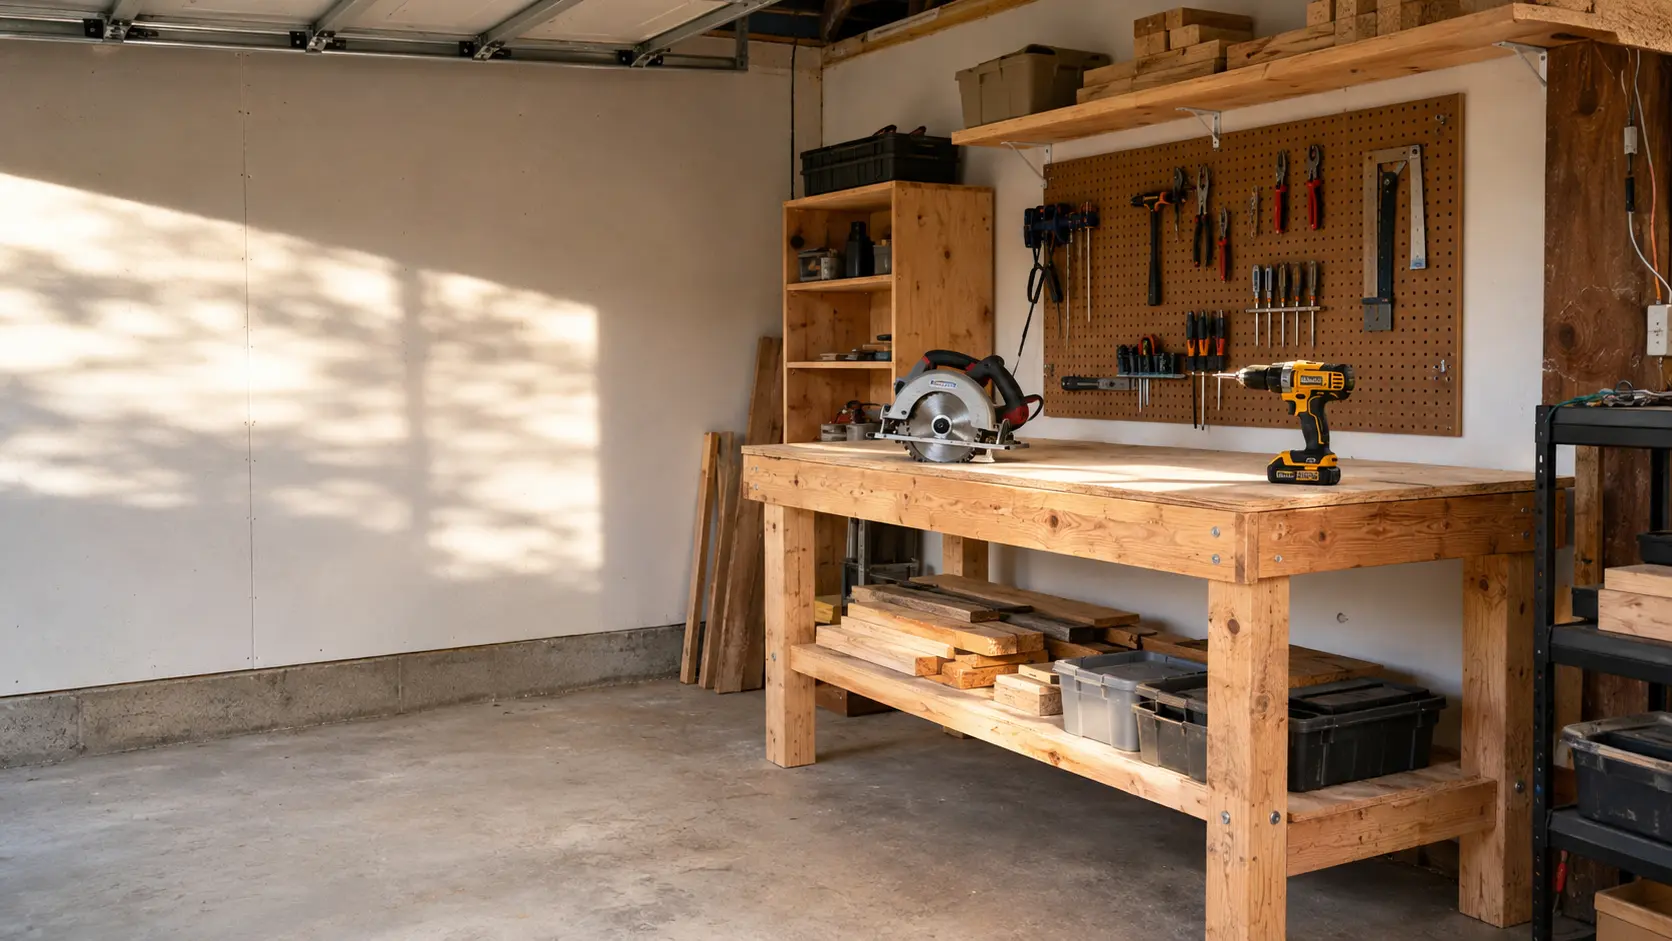
How Much Does It Cost to Start Woodworking?
Most beginners can test woodworking for about $100–$250, start with a useful drill-and-saw setup for roughly $350–$700, or build a practical small-shop setup for about $800–$1,500. The total depends on what you already own, whether you borrow tools, the projects you choose and whether the budget includes workspace improvements.
You do not need to build a complete shop before building your first project. A better question is: What is the least expensive safe setup that can complete the next two or three projects?
Woodworking startup costs at a glance
| Starting path | Planning range | What it is meant to do |
|---|---|---|
| Test the hobby | $100–$250 | Complete one small project with a hand saw, borrowed cutting tool or store-cut material |
| Core power-tool starter | $350–$700 | Build several beginner projects with a drill/driver, circular saw and basic support tools |
| Practical small shop | $800–$1,500 | Add a better work surface, sanding, cleanup, lighting, storage and more day-to-day capacity |
These are US planning ranges before sales tax, shipping and any professional electrical work. They are not minimum safety standards, and they are not based on a single brand or temporary sale.
If you already own safety equipment, a suitable drill or a stable work surface, your cash cost may be lower. If your space needs electrical upgrades, climate control or extensive dust collection, it may be substantially higher.
Why woodworking startup costs vary so much
Two beginners can say they are “starting woodworking” while planning completely different activities.
One may be building a small shelf from straight, pre-sized boards on a patio. Another may want to mill rough lumber, cut full sheets of plywood and build furniture in a garage. The second path requires more capacity, space and supporting equipment.
Your starting cost is shaped by five decisions:
- The first projects. Small projects made from common boards generally require less equipment than cabinets, large furniture or outdoor structures.
- The material condition. Pre-sized lumber costs more per board foot than some rough lumber, but rough stock requires tools or paid services to flatten and dimension it.
- Portable versus stationary tools. Portable tools usually reduce the initial cost and storage footprint.
- What the space already provides. An existing bench, adequate lighting and suitable electrical service can remove hundreds of dollars from the setup.
- How much you borrow, rent or buy used. Access can be more valuable than ownership during the testing stage.
This is why a universal “woodworking costs $X” answer is misleading. Define the starting point before comparing totals.
What should count as a woodworking startup cost?
Do not count only the two largest power tools. A realistic first-project budget is:
Real starting cost = safety + core tools + measuring and clamping + work support + first-project materials + consumables + required workspace improvements − items already owned or borrowed
This definition prevents two common errors.
The first is treating a bare cordless tool as a complete purchase when it still needs a compatible battery and charger. The second is buying tools while forgetting the blade, drill bits, sandpaper, fasteners and material required to make anything.
Count an item only if the project requires it. Do not add a planer, jointer or table saw simply because it appears in a traditional shop checklist.
Budget 1: Test woodworking for $100–$250
This path is for someone who wants to complete a small project before committing to a permanent shop.
It works best when you:
- choose a small project with few parts;
- buy straight, pre-sized boards;
- use a hand saw, borrow a cutting tool or have suitable cuts made where available;
- use an existing sturdy surface or simple work support;
- avoid projects that require sheet goods, complex joinery or extensive stock preparation.
A realistic test-the-hobby allocation
| Category | Planning range | What it may cover |
|---|---|---|
| Basic safety | $20–$45 | Eye and hearing protection; respiratory protection when the task and product instructions require it |
| Measuring and layout | $15–$35 | Tape measure, pencil and a basic square |
| Cutting access | $20–$50 | A hand saw, tool rental contribution or another project-appropriate option |
| Clamping and support | $15–$50 | A small number of suitable clamps and simple support |
| Materials and consumables | $30–$70 | Wood, fasteners, glue and sandpaper for one small project |
| Estimated total | $100–$250 | Assumes no major workspace changes |
The low end requires restraint and access to something you do not need to buy—usually a work surface, a borrowed drill or a material-cutting service. If you need to purchase every item new, expect to land near the upper end or move into the next budget.
Do not force a project into this range by using unstable support, damaged tools or missing safety equipment. Change the project instead.
What can you build on this budget?
Possible first projects include a simple shelf, small crate, basic planter, tool tote or another design that uses a short list of pre-sized boards. Select a plan with clear dimensions, an explicit material list and operations you can perform with the tools available.
The finished object is not the only result. This budget buys evidence: whether you enjoy measuring, cutting, fitting, sanding, correcting mistakes and cleaning up enough to continue.
Budget 2: Build a core power-tool setup for $350–$700
This is the most useful starting range for many beginners. It supports multiple projects without pretending to be a complete furniture shop.
The core pair is usually:
- a drill/driver with the required battery and charger; and
- a 7-1/4-inch circular saw, corded or as part of a compatible cordless system.
With the right blade, straightedge, stable support and project selection, that pair can cut parts, drill holes and drive fasteners for many beginner builds. Read Can You Start Woodworking With Just a Circular Saw and Drill? for the capabilities and limits of that setup.
A realistic core-starter allocation
| Category | Planning range | What it may cover |
|---|---|---|
| Drill and circular saw | $150–$320 | Complete drill kit plus corded saw, or a compatible cordless combination |
| Blades, bits and guides | $35–$90 | Project-appropriate saw blade, drill/driver bits and a straight cutting guide |
| Measuring, clamping and support | $70–$150 | Tape, square, several clamps and stable sawhorses or equivalent support |
| Safety equipment | $30–$70 | Eye, hearing and task-appropriate respiratory protection |
| Sanding and cleanup basics | $15–$60 | Sanding block or entry-level powered option, abrasives and basic cleanup supplies |
| First-project materials and consumables | $50–$110 | Wood, glue, fasteners and finish if required |
| Typical planned total | $350–$700 | The category highs are alternatives, not a mandatory shopping list |
Why does the table not add every maximum into the headline total? Because the choices interact. A higher-cost cordless package may include batteries and tools that replace separate purchases; a lower-cost corded saw may leave more room for support and clamps. The range represents a coherent starter setup, not the sum of every premium option.
On August 22, 2026, current US retailer listings illustrated how quickly the basket can change. Harbor Freight listed a cordless drill kit with battery and charger at about $55 and a six-tool kit at about $250. Home Depot’s power-tool combination category spanned price bands from below $100 to several hundred dollars. These examples support a range; they do not make either retailer or product our recommendation.
Corded or cordless?
A corded circular saw can reduce the purchase price and avoids buying a large saw battery. A cordless drill is often convenient because drilling and fastening happen in many positions.
If you choose a cordless saw, compare the complete operating cost:
- tool;
- compatible battery;
- charger;
- whether the battery has enough capacity for the intended work;
- likely cost of future tools in the same platform.
A $79 “tool only” saw is not a $79 solution if you own no compatible battery or charger.
Budget 3: Create a practical small shop for $800–$1,500
This range is not a miniature professional shop. It is a beginner setup that is easier to use repeatedly and easier to keep organized.
Start with the core tool budget, then add the infrastructure that removes friction:
| Addition | Planning range | Purpose |
|---|---|---|
| Stable bench or upgraded work support | $100–$250 | Measuring, clamping, assembly and repeatable setup |
| Random-orbit sander and abrasives | $50–$130 | Faster surface preparation for suitable projects |
| Wet/dry vacuum or entry dust-control setup | $100–$250 | Cleanup and source collection where compatible |
| Lighting and basic storage | $100–$250 | Better visibility and an organized working zone |
| Additional clamps and consumables | $60–$150 | More assembly capacity and replacement supplies |
| Core setup plus selected additions | $800–$1,500 | Assumes the room does not need professional renovation |
Current listings show why infrastructure matters. On the research date, basic folding sawhorses were listed at roughly $14–$27 each at one national tool retailer, while fixed beginner-scale workbenches appeared around $120–$160. A work surface can therefore be modest or consume a meaningful part of the budget.
This tier should not automatically include a table saw, miter saw, planer, jointer or large dust collector. Add a machine only when repeated project requirements justify its cost, floor area, power needs and dust-control burden.
For layout, power, lighting, storage and dust planning, see How to Set Up a Small Woodworking Shop.
The hidden costs beginners often miss
Tool prices are visible. The smaller recurring costs are easier to overlook.
Blades and bits
The blade included with a saw may not suit the desired cut or material. Drill bits and driver bits wear, break or need sizes that were not included in a starter set.
Clamps
“You can never have too many clamps” is not a useful buying rule for a beginner. You can, however, have too few suitable clamps for the first assembly. Read the plan, count simultaneous glue joints and buy only the type, capacity and quantity required.
Sandpaper, glue and fasteners
These are consumables, not permanent assets. Keep them in the project budget even when the package will last beyond one build.
Work support
A saw is not a cutting station. Long boards and panels need stable, appropriate support before, during and after the cut. Supporting the material incorrectly can bind the blade or allow pieces to move unexpectedly.
Dust collection and cleanup
A shop vacuum, hose adapters, filters, bags and replacement filters can cost more than expected. Match collection equipment to the tool and material; a vacuum is not automatically suitable for every machine or fine-dust application.
Lighting and electrical limitations
Portable lighting may be inexpensive. New outlets, circuits or repairs are not beginner DIY budget items unless you are qualified and the work is permitted. Consult a licensed electrician when the condition or capacity of the electrical system is uncertain.
Waste and mistakes
Wood with unusable defects, a bad cut or a design change can require replacement material. A small contingency—often 10% to 15% of the material allowance—is more realistic than assuming every board becomes a finished part.
Tax, shipping and storage
Price tags may exclude sales tax and delivery. Storage bins, a tool bag or wall hardware can also appear after the original calculation.
Separate tool cost from first-project cost
This distinction makes your budget easier to control.
Tool and shop costs create capacity that may support many projects. Examples include a drill, square, saw, clamps, bench and vacuum.
Project costs are attached to one build. Examples include lumber, plywood, hardware, glue, finish and a project-specific bit.
Use two subtotals:
| Budget | Example question |
|---|---|
| Setup subtotal | What must I own or access before starting? |
| Project subtotal | What will be consumed or installed in this build? |
If a $60 shelf requires $450 in new tools, that does not mean the shelf “cost $510” in the same sense as a store-bought shelf. But it also does not mean the project cost only $60. Show both numbers and decide whether the reusable capacity is worth purchasing now.
What will the first 90 days cost?
The first receipt is not the whole experiment. Beginners often buy a starter setup, complete one project and then discover that the second project needs a different clamp, blade, finish or material.
For planning purposes, reserve an additional $100–$300 after the initial setup for two or three small projects, replacement consumables and one modest correction or upgrade. This is not a required spend; it is a buffer that prevents the startup total from hiding the cost of actually using the tools.
A restrained 90-day plan looks like this:
- Choose three projects that reuse the same tool set.
- Price the materials for all three before buying another tool.
- Add a small waste allowance.
- Delay optional upgrades until the first project exposes a repeated limitation.
- Review what was used after 90 days.
If a tool stayed in its box while you repeatedly borrowed something else, your original list was wrong. That is useful information—not a reason to buy more.
How to start woodworking for less
Plan projects as a sequence
Choose projects that share material sizes, fasteners and operations. A shelf, small bench and planter that all use the same drill, saw, square and clamps create a better learning path than three unrelated builds.
Borrow before buying
Borrowing can help you test a tool category. Confirm that the tool is complete, undamaged and appropriate for the work. Obtain the manual, use the correct accessories and return it in good condition.
Use tool libraries, classes or maker spaces
Where available, shared workshops can provide access to tools, instruction and space without requiring immediate ownership. Compare membership, training, reservation and material rules with the cost of the projects you expect to build.
Rent infrequently used tools
Rental can make sense for a one-time operation. Include pickup time, deposit, consumables and the risk of rushing to meet a return deadline.
Buy materials for the plan, not for an imaginary stockpile
Bulk buying is not a saving if boards warp in poor storage or never match a project. Start with a cut list and inspect every piece.
Use pre-sized material strategically
Straight, surfaced boards may cost more per unit, but they can delay the need for milling equipment. Pay for material preparation when it is cheaper than buying, housing and learning several machines.
For a project-first spending plan, see How to Start Woodworking on a Budget.
Is it safe to buy used woodworking tools?
Used tools can reduce costs, but the discount is not worth guessing about safety.
Before buying:
- identify the exact model and, when available, serial-number range;
- search the US Consumer Product Safety Commission recall database and the manufacturer’s safety notices;
- check that guards, fences, switches, handles and other required parts are present;
- inspect cords, plugs, battery housings and chargers for damage or unauthorized modification;
- obtain the manual and verify compatible blades, bits, batteries and accessories;
- account for missing parts and consumables before comparing the total with a new tool;
- decline a tool whose condition you cannot evaluate safely.
Do not operate an unfamiliar used tool merely because the seller demonstrates that the motor runs. “It turns on” does not confirm that its safety systems, alignment or electrical condition are acceptable.
For a recalled product, follow the official remedy instructions. Do not assume a repair made by a previous owner resolved the recall.
Where not to cut the budget
Saving money should remove unnecessary capacity, not basic control.
Do not economize by:
- skipping eye or hearing protection;
- using damaged cords, plugs, batteries or chargers;
- defeating a guard or other safety feature;
- balancing material on unstable furniture;
- using the wrong blade, bit or abrasive for the tool and material;
- working in poor light;
- ignoring dust, ventilation or finish-label requirements;
- attempting electrical work beyond your qualifications;
- buying an unknown used tool without checking recalls and missing parts.
If the safe setup exceeds the budget, reduce the project scope, borrow appropriate equipment or wait. The project is optional; the consequences of an uncontrolled tool are not.
What you probably do not need at the beginning
Many beginners can postpone:
- a table saw;
- a jointer and planer;
- a miter saw if a circular saw can make the required cuts safely and accurately;
- a large stationary dust collector;
- a premium hardwood workbench;
- a wall of specialty hand planes;
- multiple cordless battery platforms;
- large lumber inventory;
- decorative shop cabinetry;
- tools purchased for “someday” projects.
This is not a claim that those tools lack value. It is a sequencing decision. Buy capacity when a repeated, specific limitation appears.
Build your personal woodworking startup budget
Write the first two or three projects at the top of the page, then complete this worksheet.
| Category | Required for which project? | Buy new | Buy used | Borrow/rent | Already own | Planned cost |
|---|---|---|---|---|---|---|
| Safety equipment | $ | |||||
| Drill/driver and power source | $ | |||||
| Saw and project-appropriate blade | $ | |||||
| Measuring and layout | $ | |||||
| Clamps | $ | |||||
| Work support | $ | |||||
| Sanding | $ | |||||
| Dust control and cleanup | $ | |||||
| Lighting/storage changes | $ | |||||
| First-project materials | $ | |||||
| Consumables | $ | |||||
| Tax/shipping contingency | $ | |||||
| Total | $ |
Then ask three questions:
- Can one borrowed or rented item remove a large purchase?
- Can a simpler first project remove a tool category?
- Will each purchased tool be used in at least two of the first three projects?
If the third answer is no, delay the tool unless it is essential for safety or the only practical way to complete a required operation.
Bottom line
Plan on $100–$250 to test woodworking, $350–$700 for a useful core power-tool setup, or $800–$1,500 for a practical small shop. Treat those figures as decision ranges, not promises.
The smartest beginner budget is not the smallest receipt or the biggest tool bundle. It is the least expensive safe setup that completes several well-chosen projects, fits the space and leaves money for material.
Start with the project. Buy the capacity the project requires. Let repeated work—not a shopping checklist—decide what comes next.
Frequently asked questions
Can I start woodworking for $100?
Possibly, if you choose a small project, already own or borrow some basic items and use pre-sized or store-cut material. If you must buy every tool, support item, safety item and material new, $100 is unlikely to cover a useful power-tool setup.
Is $500 enough to start woodworking?
For many beginners, yes. About $500 can support a drill/driver, circular saw, appropriate blades and bits, measuring tools, clamps, basic safety equipment, work support and material for a first project. Exact prices and what you already own determine the result.
Do I need a table saw to start woodworking?
No. Many beginner projects can be completed with a circular saw, straightedge, drill and appropriate work support. A table saw may become useful later, but it adds cost, space, power and dust-control requirements.
Should I buy a large tool combo kit?
Only if the included tools match your near-term projects and the kit includes the batteries and charger you need. A low per-tool price is not a saving when several tools remain unused.
Are used tools a good way to save money?
They can be. Verify the model, check recalls, inspect required safety parts and calculate the cost of missing batteries, chargers, blades or repairs. Walk away when condition or history is uncertain.
Research method and sources
Price ranges were researched on August 22, 2026 using current US listings from Home Depot power-tool combo kits, Lowe’s power-tool combo kits, Harbor Freight power-tool combo kits, Harbor Freight workbenches and sawhorses, and representative lumber listings from Home Depot.
The ranges use regular planning prices where visible. Short-term promotions, member-only prices and unusually expensive outliers were not used as the basis for the headline budgets. Prices are rounded, vary by location and can change after publication. Tax, shipping and professional electrical work are excluded. Bare cordless tools were not counted as complete setups unless a compatible battery and charger were already owned.
Safety references include the US Consumer Product Safety Commission recall database, the CPSC’s Home Electrical Safety Checklist and the Occupational Safety and Health Administration’s wood-dust guidance. Always follow the current manual, warning labels and instructions for the specific tool, accessory and material.
No manufacturer supplied or reviewed this article. The Practical Woodshop did not conduct hands-on product testing for this guide. Retail listings are cited as market price observations, not endorsements. This article contains no affiliate links.