7 Beginner Projects You Can Build With Basic Tools
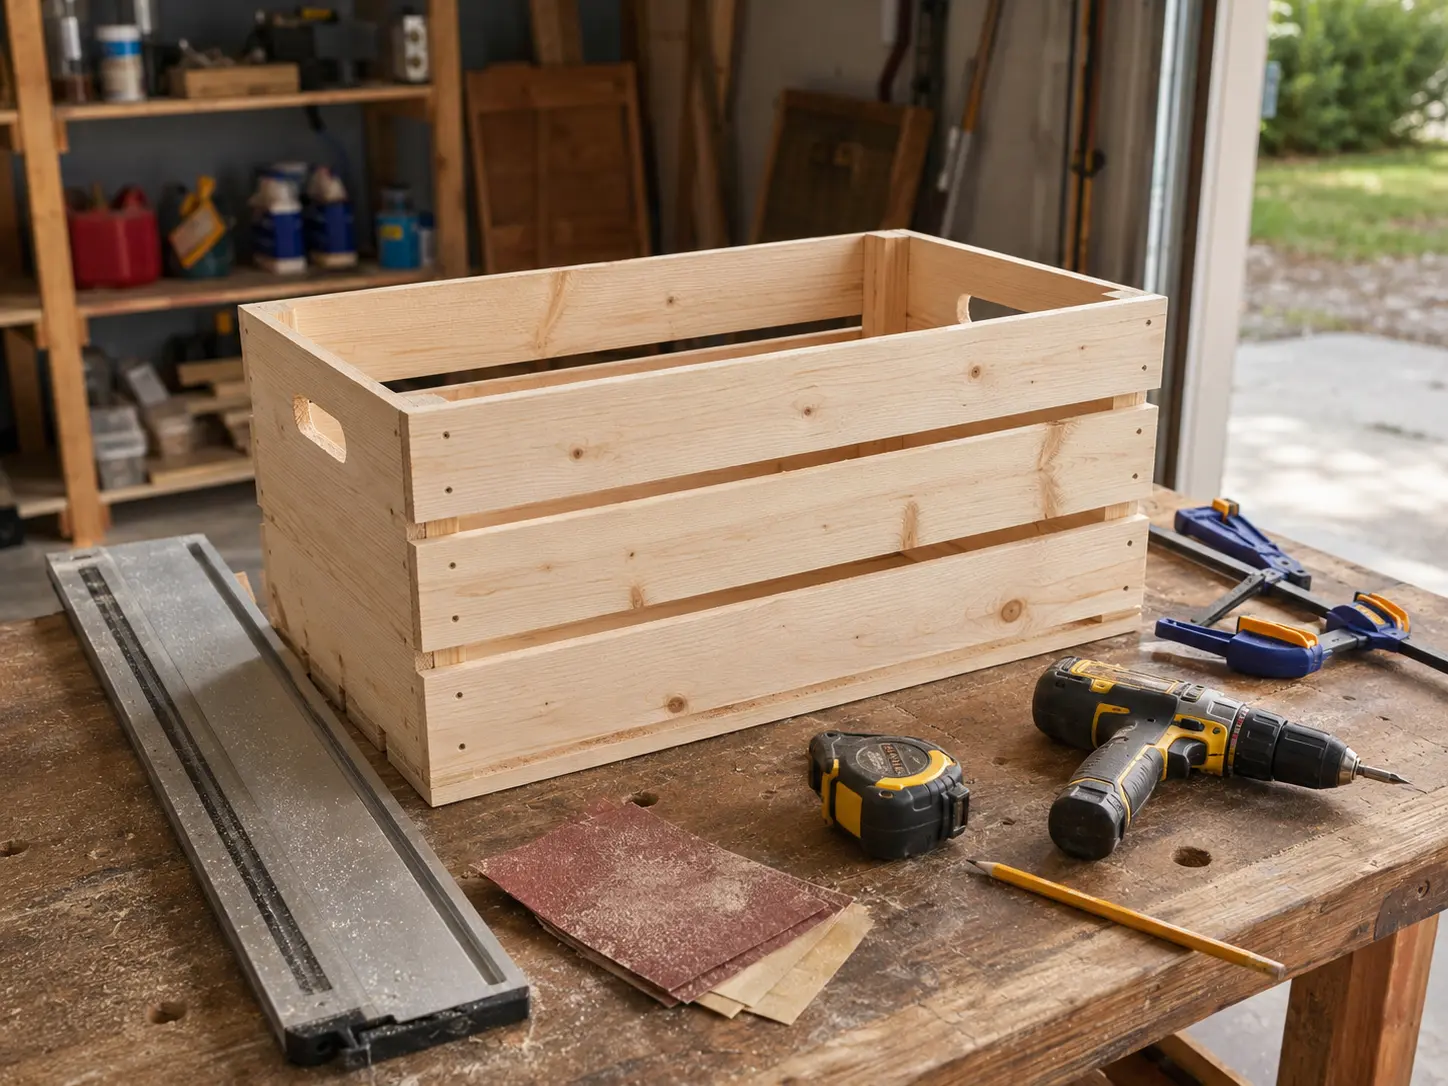
You can build useful beginner projects with a circular saw, drill and a small supporting kit. Good choices include an open storage crate, simple wall shelf, wooden tool tote, rectangular planter box, desktop organizer, two-tier shoe rack and compact side table.
The best first project is not necessarily the smallest or most popular. It is the one that:
- uses operations you can perform safely;
- fits your workspace;
- has a complete plan;
- uses material you can transport and support;
- teaches a skill you will use again.
This page helps you choose a project. It does not pretend that seven project ideas are seven complete building plans.
The seven projects at a glance
| Project | Main skill | Relative material use | Difficulty |
|---|---|---|---|
| Open storage crate | Repeated cuts and square assembly | Low | Low |
| Simple wall shelf | Alignment and controlled assembly | Low | Low |
| Wooden tool tote | Build sequence and portability | Low | Low–medium |
| Rectangular planter box | Spacing and outdoor material decisions | Low–medium | Low–medium |
| Desktop or book organizer | Accuracy with smaller parts | Low | Medium |
| Two-tier shoe rack | Repetition, spacing and parallel parts | Medium | Medium |
| Compact side table | Stability and multi-stage assembly | Medium | Medium |
Difficulty is relative to the projects on this page. It is not a promise that every plan using the same project name will be beginner-friendly.
What “basic tools” means here
For this guide, the two core power tools are:
- a circular saw; and
- a drill/driver.
That does not mean literally building with only two objects. A practical supporting kit includes:
| Item | Purpose |
|---|---|
| Tape measure and pencil | Measure and mark parts |
| Square | Mark and check square cuts and assemblies |
| Straightedge or saw guide | Guide longer circular-saw cuts |
| Project-appropriate clamps | Secure guides, workpieces and assemblies |
| Suitable drill and driver bits | Drill pilot holes and drive the specified fasteners |
| Appropriate saw blade | Match the saw, material and required cut |
| Stable work support | Support material without binding or shifting |
| Safety glasses | Protect against chips and debris |
| Hearing protection | Reduce exposure during powered operations |
| Task-appropriate dust protection | Address dust generated by the material and operation |
| Sandpaper and sanding block | Ease edges and prepare surfaces |
A powered sander may save time, but it is optional for the project-selection standard used here.
If you are deciding whether this small setup is enough, read Can You Start Woodworking With Just a Circular Saw and Drill?.
The Basic-Tool Gate
Every project in this list was selected to allow a version that does not require:
- a table saw;
- a miter saw;
- a router;
- a jointer or planer;
- a pocket-hole jig;
- a nail gun;
- complex curved cuts;
- advanced joinery.
The designs should use mostly straight cuts, pre-sized boards and simple mechanical assembly.
That does not mean every plan found online passes the gate. A “simple shoe rack” may quietly use a table saw to rip narrow strips. A “beginner side table” may depend on pocket holes, angled cuts and a nailer. Read the entire plan before buying material.
Our selection rules
A suitable plan should:
- list every tool and accessory;
- provide finished dimensions;
- identify actual material sizes and quantities;
- include a complete cut list;
- specify fasteners and assembly order;
- avoid operations your setup cannot perform;
- explain mounting, outdoor use or load limitations where relevant.
If one of those items is missing, the project may still be buildable—but the uncertainty has moved from the author to the beginner.
1. Small open storage crate
An open crate is a strong first project because the concept is easy to understand: a bottom, two sides, two ends and optional slats depending on the plan.
Why it fits a beginner
The parts can be made from pre-sized boards with straight crosscuts. Assembly can use pilot holes, screws and glue when the plan specifies them.
What it teaches
- measuring from a cut list;
- making repeated parts;
- marking the waste side;
- drilling pilot holes;
- holding parts in position;
- checking an assembly for square;
- sanding exposed edges.
Tool and material profile
| Item | Practical expectation |
|---|---|
| Core power tools | Circular saw and drill/driver |
| Supporting tools | Square, clamps, bits, sanding block and stable support |
| Material format | Pre-sized boards or a plan designed around an available project panel |
| Relative material use | Low |
| Main challenge | Keeping opposite parts equal and the box square |
Common beginner mistake
Cutting each repeated part from a fresh measurement without comparing it with the others. Small differences accumulate and can pull the assembly out of square.
Follow the plan’s measurement method. Where appropriate, compare mating parts before assembly rather than assuming the written dimension alone guarantees a match.
Skip this project if
- the plan requires several narrow rip cuts;
- the box is expected to carry a load the plan does not address;
- the design uses grooves, dados or concealed joinery without an alternate method;
- the parts are too small to clamp and support safely with your setup.
Best next project
A tool tote or planter box reuses the box-assembly skills while adding a new constraint.
2. Simple wall shelf
A basic shelf can use one horizontal board and a pair of plan-specified supports or brackets. The woodworking may be simple; the wall installation is a separate job that requires equal attention.
Why it fits a beginner
The shelf itself can be based on straight cuts and a short material list. It also teaches an important lesson: completing the wooden object does not automatically make it ready for use.
What it teaches
- selecting a straight board;
- measuring finished length;
- making a controlled crosscut;
- sanding and finishing a broad face;
- aligning supports;
- separating furniture construction from building installation.
Tool and material profile
| Item | Practical expectation |
|---|---|
| Core power tools | Circular saw and drill/driver |
| Supporting tools | Square, clamps, straightedge, bits and sanding method |
| Material format | One pre-sized board plus plan-specified supports or rated hardware |
| Relative material use | Low |
| Main challenge | Mounting the completed shelf appropriately |
Common beginner mistake
Treating generic wall anchors as interchangeable or guessing how much the shelf can hold.
The mounting method depends on the wall construction, hardware, shelf geometry and intended load. Follow the hardware manufacturer’s instructions and the project plan. Locate framing or use an appropriate fastening system when required. Do not publish or rely on an invented load rating.
Skip this project if
- you cannot identify a suitable mounting method;
- the plan does not explain the support system;
- the shelf will hold heavy, fragile or hazardous items without a verified design;
- the design depends on invisible floating-shelf hardware not included in the plan.
Best next project
A desktop organizer keeps the precision challenge but removes the wall-installation step.
3. Wooden tool tote
A beginner-friendly tool tote can use rectangular end panels, a bottom, side rails and a straight handle board or other simple plan-specified handle. Avoid decorative curved ends if the design requires a jigsaw you do not own.
Why it fits a beginner
The tote is small enough for limited workspaces and useful for storing the same tools used to build it. It introduces sequence: some parts must be installed before others block access.
What it teaches
- reading the full assembly order;
- matching two end pieces;
- spacing rails consistently;
- drilling near board ends without splitting;
- checking handle position;
- easing edges that will be touched frequently.
Tool and material profile
| Item | Practical expectation |
|---|---|
| Core power tools | Circular saw and drill/driver |
| Supporting tools | Tape, square, clamps, bits and sanding method |
| Material format | Pre-sized boards selected around a straight-cut design |
| Relative material use | Low |
| Main challenge | Keeping the tote aligned while assembling several narrow parts |
Common beginner mistake
Choosing a design because the finished tote looks simple, then discovering that its handle opening and decorative sides require curved or interior cuts.
Review each part shape, not just the finished photograph.
Skip this project if
- the plan does not explain how the handle is attached;
- you intend to carry a load beyond what the design addresses;
- narrow parts cannot be held securely;
- the design requires unsupported freehand circular-saw cuts.
Use limitation
Treat the tote as an organizer for the intended contents, not as a step, seat or load-rated lifting device. No load capacity should be assumed without a verified design.
Best next project
A shoe rack adds longer parts and repeated spacing while keeping the joinery straightforward.
4. Rectangular planter box
A basic planter box can be forgiving because slight cosmetic variation may be acceptable outdoors. The material and use decisions, however, matter more than the simple shape suggests.
Why it fits a beginner
Many rectangular designs use repeated crosscuts and screw assembly. The project can be sized around common boards rather than requiring full sheets.
What it teaches
- batching repeated parts;
- maintaining spacing between slats where specified;
- planning drainage;
- selecting exterior-compatible fasteners;
- reading product labels for outdoor materials and finishes;
- distinguishing decorative use from food-growing use.
Tool and material profile
| Item | Practical expectation |
|---|---|
| Core power tools | Circular saw and drill/driver |
| Supporting tools | Square, clamps, appropriate bits, sanding and stable support |
| Material format | Plan-specified boards suitable for the exposure and intended use |
| Relative material use | Low–medium |
| Main challenge | Making material, drainage and finish decisions that fit the application |
Common beginner mistake
Selecting reclaimed, treated or coated material without knowing its history, labeling or suitability for the intended plants.
For a decorative flower planter, material requirements differ from a container intended to grow edible plants. University of Minnesota Extension advises avoiding old lumber of uncertain treatment history in gardens and notes that treatment type matters. Use current, labeled material and follow reliable garden and manufacturer guidance for the intended use.
Skip this project if
- the plan ignores drainage;
- material suitability is unclear;
- the box is large enough that soil weight and structure need engineering beyond the plan;
- the design requires ripping many narrow slats;
- you cannot work or finish it in conditions required by the product instructions.
Best next project
A compact side table adds a higher demand for stability and visual alignment.
5. Desktop or book organizer
A desktop organizer may use a base, dividers and a back, creating open compartments for mail, notebooks or small tools.
Why it fits a beginner
It uses little material and fits a small workspace. It also reveals whether your measuring and cutting process can keep several small parts consistent.
What it teaches
- laying out divider positions;
- accounting for actual material thickness;
- transferring repeated measurements;
- assembling small parts without shifting;
- controlling glue squeeze-out;
- sanding inside corners before final assembly.
Tool and material profile
| Item | Practical expectation |
|---|---|
| Core power tools | Circular saw and drill/driver when the design uses screw assembly |
| Supporting tools | Square, small suitable clamps, bits and sanding block |
| Material format | Pre-sized boards or a project panel with cuts wide enough to support safely |
| Relative material use | Low |
| Main challenge | Small inaccuracies become visible across several dividers |
Common beginner mistake
Using nominal thickness in the layout instead of measuring the actual material. Several small differences can cause the last compartment or end panel to miss its intended position.
Skip this project if
- parts are too narrow to secure safely;
- the design requires dados for every divider without offering simple surface assembly;
- the plan uses brad nails as the only practical assembly method;
- you need furniture-grade invisible joinery from the first attempt.
Best next project
A two-tier shoe rack applies the same spacing logic to longer and heavier parts.
6. Two-tier shoe rack
A simple shoe rack can use two side frames or end panels connected by horizontal shelf boards. Choose a rectangular design rather than one with angled legs or decorative slats.
Why it fits a beginner
The parts remain understandable, but the project introduces greater length and more opportunities for a twist or uneven stance.
What it teaches
- cutting repeated shelf parts;
- keeping two sides matched;
- maintaining parallel levels;
- supporting longer boards;
- checking the frame for rocking;
- planning assembly so the drill can reach each fastener.
Tool and material profile
| Item | Practical expectation |
|---|---|
| Core power tools | Circular saw and drill/driver |
| Supporting tools | Square, straightedge, longer clamps where required, bits and sanding method |
| Material format | Pre-sized boards selected around the desired shoe dimensions |
| Relative material use | Medium |
| Main challenge | Keeping the structure square, parallel and stable |
Common beginner mistake
Building from an attractive photo without checking whether the shelf spacing fits the actual footwear. Boots, adult shoes and children’s shoes create different dimensional requirements.
The plan should provide dimensions, but the user should verify the intended contents before cutting.
Skip this project if
- the plan relies on angled legs or compound cuts;
- long narrow parts cannot be supported safely;
- it is intended as a seat but the design provides no verified seating capacity;
- the rack will be wall-mounted without a suitable installation method.
Use limitation
Do not sit, stand or climb on a shoe rack unless it was specifically designed, tested and rated for that use.
Best next project
A compact side table builds on the frame and spacing skills while adding a top and more visible alignment.
7. Compact side table
A rectangular side table is the most demanding option in this list. Choose a design based on straight legs, simple aprons or rails and a pre-sized top. Avoid tapered legs, drawers, angled joinery and complex edge profiles.
Why it fits a progressing beginner
It combines several skills from the earlier projects in one object: repeated parts, square frames, assembly order, a broad top and the need to stand evenly.
What it teaches
- matching leg or side components;
- building square subassemblies;
- attaching a top according to the plan;
- controlling racking;
- checking the table on a flat reference surface;
- preparing visible faces consistently.
Tool and material profile
| Item | Practical expectation |
|---|---|
| Core power tools | Circular saw and drill/driver |
| Supporting tools | Square, several suitable clamps, straightedge, bits and sanding method |
| Material format | Straight pre-sized boards and a suitable top specified by the plan |
| Relative material use | Medium |
| Main challenge | Producing a stable frame that does not rock or rack |
Common beginner mistake
Assuming four parts cut to the same written length automatically create a level table. Cut accuracy, assembly alignment, floor condition and material straightness all matter.
Skip this project if
- the plan depends on pocket-hole joinery and you do not own or intend to use that system;
- the top requires a wide panel glue-up you cannot flatten;
- the design includes drawers or tapered legs;
- the plan provides no strategy for frame stability;
- the table is intended to support a heavy or valuable item without an appropriate design.
Use limitation
A side table is not a chair, step stool, ladder or work platform. Do not stand or sit on it.
Which project should you build first?
Use the decision table instead of choosing by appearance alone.
| Your priority | Best starting candidate |
|---|---|
| Lowest material commitment | Open storage crate or desktop organizer |
| Learn square box assembly | Open storage crate |
| Build something for the tool kit | Wooden tool tote |
| Make an outdoor project | Planter box after verifying material and use |
| Learn wall installation separately | Simple shelf |
| Practice repeated long parts | Shoe rack |
| Combine several skills | Compact side table |
Before committing, ask:
- Can I perform every cut with my current setup?
- Can I support and clamp every part?
- Does the completed project fit the workspace and intended location?
- Does the plan specify the material, fasteners and sequence?
- Is there a use or load assumption the plan fails to address?
If any answer is unclear, choose another plan or another project.
Projects that only look beginner-friendly
Some small objects are less forgiving than their size suggests.
End-grain or laminated cutting boards
These may require accurate strip cutting, controlled glue-ups, flattening and appropriate food-contact finishing decisions. A basic single-board serving board is a different project, but “cutting board” is not automatically beginner-simple.
Picture frames
Four small pieces look manageable, but tight miter joints reveal tiny angle and length errors. A square butt-jointed frame may fit the basic-tool gate; a traditional mitered frame usually demands a more precise method.
Step stools and small ladders
They are compact but intended to support a person above the floor. That consequence makes them poor candidates for unverified beginner instructions.
Seating benches
A bench may use straight cuts, but seating loads, racking and fastener design matter. Do not choose one merely because the photograph shows four legs and a top.
Floating shelves
The wooden box may be easy while the concealed wall support, load path and installation are not.
Full-size workbenches
A workbench can be an excellent project after the required operations, clamping needs and stability are understood. It can also consume the entire starter budget and require the very work support it is supposed to replace.
How to evaluate a woodworking plan before building
A useful plan should answer the questions below without forcing you to reverse-engineer the photos.
Project definition
- What are the finished dimensions?
- What is the intended use?
- Are load, mounting or outdoor limitations stated?
Materials
- Are actual board sizes, quantities and grades clear?
- Are fasteners and hardware specified?
- Is material suitability explained for outdoor, garden or wall use?
Tools and operations
- Is the complete tool list shown before the instructions?
- Does each cut match a tool you can use safely?
- Are optional tools separated from required tools?
- Does the project require narrow rips, curves, dados or miters?
Cut list
- Is every part named and counted?
- Are dimensions internally consistent?
- Does the plan distinguish nominal and actual lumber sizes?
- Can the parts be cut from material you can transport and support?
Assembly
- Is the order clear?
- Are pilot holes, spacing and fastener locations addressed?
- Can clamps and the drill reach each joint at the required step?
- Does the plan explain how to check square and stability?
Finish and installation
- Are surface preparation and finish requirements identified?
- Are product instructions treated as authoritative?
- Is wall mounting separated from woodworking when relevant?
For a detailed checklist, continue to What Should a Good Woodworking Plan Include?.
What should you buy after project one?
Do not buy the tool that appeared most often in videos. Buy the tool that would remove a repeated, specific limitation.
| Repeated problem | Possible next capability to evaluate |
|---|---|
| Hand sanding dominates every project | Random-orbit sander with appropriate dust control |
| Projects require curves or interior openings | Jigsaw and project-appropriate blades |
| Repeated crosscuts are slow to set up | Better circular-saw guide or, after evaluation, a miter-saw system |
| Assemblies move during fastening | Additional project-appropriate clamps |
| Dust collection is difficult | Compatible vacuum, adapters and filtration |
| Narrow rips repeatedly block projects | Different material sizes, paid cutting service or an appropriate saw system after training and space review |
Apply the method from How to Start Woodworking on a Budget: buy a tool when it solves work you are actually doing.
Safety before every project
Before cutting:
- read the current tool manual;
- inspect the tool, guard, blade, bit, cord or battery;
- use accessories compatible with the tool and material;
- support the workpiece so it cannot shift, sag or close on the blade;
- keep hands, cords, hoses and clamps clear of the cutting path;
- wear the required personal protective equipment;
- keep children, pets and bystanders outside the work area;
- unplug the tool or remove its battery before blade changes and applicable adjustments.
Cutting action can produce flying chips, and wood that twists or binds can contribute to kickback. The exact safe procedure depends on the saw and operation, so the manufacturer’s manual—not a generic project list—controls.
Do not improvise an unsupported freehand cut because the plan omitted a jig or guide. Change the setup or choose a different plan.
Bottom line
Start with an open crate, shelf, tool tote, planter, desktop organizer, shoe rack or compact side table—but choose the plan, not just the project name.
The right beginner project uses straight, supportable cuts; pre-sized material; a complete cut list; simple assembly; and no hidden specialty-tool requirement. It should teach one or two reusable skills without forcing you to build a full shop first.
One completed, well-chosen project is more useful than a bookmark folder containing fifty “easy” ideas.
Frequently asked questions
What is the easiest woodworking project for a complete beginner?
A small open storage crate is a strong candidate because it uses understandable rectangular parts, repeated straight cuts and simple assembly. The specific plan must still match your tools, material and skill level.
Can I build furniture with only a circular saw and drill?
You can build simple shelves, racks, tables and storage projects when the design uses straight cuts and appropriate screw assembly. You still need measuring tools, guides, clamps, safety equipment, stable support and a sanding method.
Do I need a pocket-hole jig for beginner projects?
No. Pocket holes are one possible joinery method, not a universal requirement. Choose plans designed for fasteners and assembly methods you can perform correctly with your current tools.
Is a cutting board a good first project?
Not always. Laminated and end-grain cutting boards can require accurate strip cutting, glue-up, flattening and food-contact decisions. Their small size does not make them automatically easy.
Should my first project be a workbench?
Only if the workbench plan fits your tools, space and current support setup. A compact basic bench can be useful, but a large traditional bench can consume substantial material and introduce joinery that is unnecessary for testing the hobby.
Does this article include complete project plans?
No. It is a project-selection guide. A complete plan should include verified dimensions, cut list, materials, fasteners, sequence and limitations. Those details should not be invented merely to turn a list of ideas into instructions.
Research method and sources
This guide was researched on August 22, 2026. We reviewed current beginner-project collections, including The Created Home’s beginner project list, Kreg Tool’s easy project collection, Saws on Skates’ minimal-tool project list and discussions from beginners working with a circular saw and drill on Reddit.
Those sources helped identify common project types and hidden tool requirements. The seven projects, Basic-Tool Gate, progression and plan-evaluation framework were developed for this guide. External lists were not treated as evidence that every linked design is suitable for every beginner.
Safety references include the Occupational Safety and Health Administration’s guidance on woodworking kickbacks and flying chips and material, plus the US Consumer Product Safety Commission recall database. Garden-material context comes from University of Minnesota Extension’s raised-bed guidance.
No manufacturer supplied or reviewed this article. The Practical Woodshop did not build or test these seven projects for this guide. This page provides project-selection criteria, not construction drawings, structural ratings or installation instructions. It contains no affiliate links.