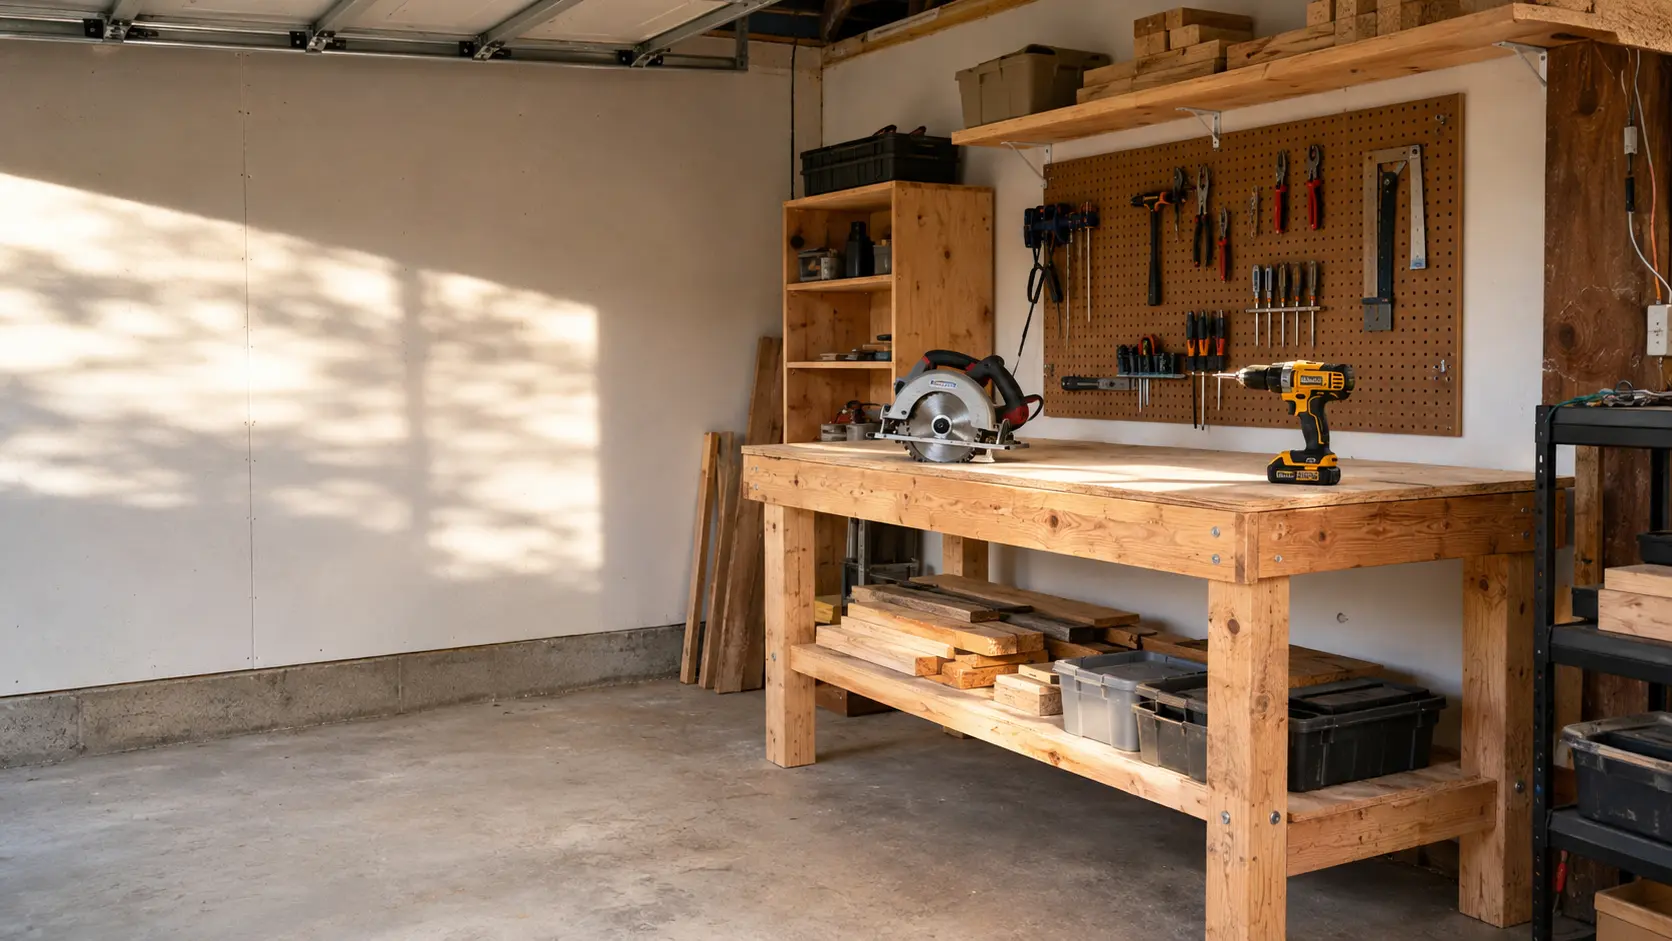
How to Organize a One-Car Garage Woodworking Shop
A one-car garage can work as a woodworking shop if you organize it around operating clearance—not around how many tools fit against the walls. Keep permanent storage shallow, use mobile or folding work support, protect doors and utilities, and create a reset routine if the car returns after every session.
Start by deciding which room you actually have:
- a shared garage that must become a parking space again; or
- a dedicated garage that can remain a shop.
Those are different systems. A shared garage is not merely a smaller dedicated workshop. It is a room that changes function.
One-car garage organization at a glance
| Priority | Practical rule |
|---|---|
| Vehicle | Remove it before woodworking and preserve its full parking envelope for the reset. |
| Permanent storage | Keep it outside the parking envelope and away from required access areas. |
| Work surface | Use one stable folding, mobile or compact bench appropriate for the work. |
| Tools | Store portable tools as complete operating kits; add machines only when justified. |
| Material | Buy by project and plan the path for the longest piece. |
| Dust | Capture it near the source and clean before the vehicle and household items return. |
| Power | Keep suitable cords and hoses out of cutting and walking paths. |
| Reset | Every active item needs a destination that can be reached quickly. |
There is no universal one-car garage floor plan. The usable area depends on the room, vehicle, garage door, interior doors, appliances, electrical equipment, floor slope and projects.
Is a one-car garage big enough for woodworking?
Yes, for many beginner projects and portable-tool workflows. It may support shelves, boxes, planters, small benches, storage projects and some furniture work when the material and assembly fit the operating area.
It may not be practical for:
- routinely breaking down full 4-by-8-foot sheets indoors;
- storing large quantities of lumber;
- operating several stationary machines without moving them;
- assembling projects larger than the available clear floor area;
- working while a vehicle remains inside;
- any operation that blocks a required exit or utility access.
Square footage alone does not answer the question. A shop with 200 square feet of obstructed floor can function worse than a smaller room with a clear work path and disciplined storage.
For the full setup sequence—workflow, power, lighting, dust and purchasing—see How to Set Up a Small Woodworking Shop. This guide focuses specifically on organizing a one-car garage.
Step 1: Measure the real usable space
Begin with an empty-floor drawing, not a tool wish list.
Record:
- wall-to-wall dimensions;
- ceiling height;
- garage-door opening and track locations;
- the path and travel of the garage door;
- interior and exterior doors, including their swing;
- windows;
- outlets and fixed lights;
- electrical panels and disconnects;
- water heaters, furnaces, laundry appliances and plumbing;
- steps, curbs, posts and floor drains;
- shelves and household storage that will remain;
- floor slope and uneven areas;
- the longest material you expect to handle;
- the vehicle’s actual dimensions with mirrors and required door opening.
Do not treat the space in front of an electrical panel, water heater or household door as available merely because nothing is stored there today. Maintain all access and clearance required by current codes, equipment instructions and local authorities.
Test the floor before building furniture
A garage floor is often sloped toward the door. That may be intentional for drainage, but it can affect benches, mobile bases and assembly.
Check whether the proposed work surface rocks, rolls or places an assembly noticeably out of level. Use a bench or support system designed to remain stable in the actual location. Do not improvise unstable shims under a machine or rely on casters that cannot hold position.
Step 2: Choose shared or dedicated mode
Make this decision before attaching anything to the floor or building a long fixed bench.
| Question | Shared garage | Dedicated garage |
|---|---|---|
| Does the car return regularly? | Yes | No |
| Can the center stay occupied? | No | Sometimes |
| Best permanent storage | Shallow wall zone | Perimeter storage and selected mobile stations |
| Best work surface | Folding, nesting or easily parked | Compact fixed or mobile bench |
| Material inventory | Minimal and project-based | Limited rack or cart may be practical |
| End-of-session requirement | Full parking reset | Safe cleanup and clear paths |
If the car returns only occasionally, design for shared mode until experience proves that a dedicated layout is appropriate. It is easier to add a permanent bench later than to discover that it prevents a door from opening.
Shared mode is a transformation system
The shop must move predictably between two states:
Parking state: vehicle space clear, tools stored, floor clean, access protected.
Working state: vehicle removed, work support deployed, tools connected, operating clearances open.
Every item should have a parking location in both states. If a mobile bench has nowhere to go when the car returns, it is not mobile storage—it is an obstacle on wheels.
Dedicated mode still needs open space
A dedicated garage does not justify filling the center with machines. Preserve space for assembly, material movement and operator position. Stationary tools require more than their cabinet footprint.
Step 3: Use the Parking Envelope Test
The parking envelope is the area that must return to vehicle use after woodworking.
To mark it:
- Clear the intended parking area.
- Park the vehicle in its normal position.
- Mark the tire locations or vehicle outline with removable tape where appropriate.
- Open the doors and hatch used in normal parking.
- Mark the space needed to enter, exit and carry ordinary items.
- Include mirrors and any charging-cable path.
- Confirm that interior doors, steps, utilities and emergency paths remain accessible.
- Remove the vehicle and keep all permanent shop installations outside the marked area.
Do not install storage where it will contact an open vehicle door or force the driver to squeeze past sharp tools, projecting lumber or hardware.
Add a safety margin
The tape line is not a target for placing cabinet handles and clamp ends. Allow enough margin for normal parking variation and body movement.
Consider everyone who uses the garage. A layout that works only when one person parks within an inch of the same spot is fragile.
Step 4: Protect doors, utilities and walking paths
Create a second no-storage layer around the parking envelope.
Protect:
- the path from the vehicle to the house;
- exterior exit routes;
- the electrical panel and required working area;
- water heater, furnace and appliance service access;
- garage-door sensors, tracks and opener components;
- stairs and handrails;
- shutoffs and controls;
- floor drains and areas that must remain visible.
Do not route cords or dust hoses across stairs, door thresholds or the normal path into the house. When a temporary crossing cannot be avoided during an operation, control access and remove it immediately afterward.
Garage doors create an overhead moving zone. Shelving, lumber and hanging cords must remain clear of the door, springs, tracks and opener. Do not modify garage-door components as part of shop storage.
Step 5: Divide the garage into four zones
A useful plan separates functions before choosing cabinets.
| Zone | Purpose | Non-negotiable condition |
|---|---|---|
| Parking and reset | Receives the vehicle after cleanup | No permanent shop storage inside it |
| Work | Cutting, drilling, assembly and sanding | Full operating clearance while active |
| Storage | Tools, accessories, material and active project | Items restrained and retrievable without unsafe lifting |
| Protected access | Doors, utilities, controls and walking paths | Remains available in both shop states |
Zones can overlap in time but not in purpose. During work, the parking area may become open assembly space. At reset, it must become parking space again.
Keep the center flexible
In shared mode, the center is temporary workspace. In dedicated mode, it may hold a mobile bench, but it should still be possible to reposition the bench for long material or larger assembly.
Do not turn every empty floor area into a cabinet location. Empty floor is one of the most useful tools in a small shop.
Step 6: Plan operating clearance, not storage footprint
A tool may fit on a shelf while the operation does not fit in the room.
For each likely task, map:
- where uncut material begins;
- how it is supported;
- where the tool and operator move;
- where the offcut or completed part goes;
- where the cord, battery or hose travels;
- how the operation stops safely if something changes.
Use an unpowered rehearsal. Place the support, guide and material in position without plugging in or installing a battery. Walk through the operation and check for walls, doors, shelves, vehicles, cords and awkward body positions.
Think along the long axis
Boards need infeed and outfeed space. When possible, align long operations with the garage’s longest clear direction. The open garage doorway may provide temporary additional clearance, but only when weather, visibility, property boundaries and safe control permit it.
Do not let material project into a sidewalk, street or area used by other people.
Wheels do not create clearance
A mobile machine is useful only when it has:
- a safe parked location;
- a clear route to the operating location;
- a stable operating position;
- effective wheel or base locking;
- access for material and the operator;
- a practical return path after use.
Rolling three machines into the same central area still allows only one safe operation at a time.
Step 7: Build a one-wall tool system
For a garage that still parks a car, one shallow wall zone is often more useful than cabinets on every side.
Organize the wall by workflow:
Measuring and planning
Keep pencils, tape measures, squares, layout tools, instructions and a small writing surface together.
Cutting
Store the saw, guide, blade tools, compatible extraction connection and required clamps as one operating group.
Drilling and fastening
Keep the drill, batteries, charger, bits, countersink, fasteners and manual within the same zone.
Sanding and cleanup
Store the sanding method, abrasives, vacuum accessories, filters and cleanup tools together.
Assembly
Keep glue, project-appropriate clamps, assembly blocks and fasteners close to the deployed work surface.
The point is not visual symmetry. It is reducing the number of unrelated items you must move before starting one task.
Store complete operating kits
A circular saw in one cabinet, guide behind household boxes, blade wrench in a drawer and vacuum adapter somewhere else creates setup friction.
Group each portable tool with:
- its required accessory;
- adjustment tool;
- compatible cord or battery system;
- dust connection when used;
- manual or easy access to the current manual.
Do not store sharp accessories loose in a bin where they can damage hands or each other.
Step 8: Choose folding, mobile or fixed work support
The correct bench is the one that supports the work safely and fits both garage states.
| Support type | Strength | Limitation |
|---|---|---|
| Folding sawhorses with suitable top | Small stored footprint and flexible size | Setup repeats every session |
| Portable folding workbench | Fast deployment and integrated clamping on some models | Limited surface and load capacity |
| Wall-mounted folding bench | Preserves floor area when folded | Wall capacity, mounting and projecting hardware require careful planning |
| Mobile bench | Storage and work surface move together | Needs a real parking location and stable locking |
| Compact fixed bench | Always ready and usually stable | Permanently consumes floor area |
Do not assume a household folding table is suitable for sawing, clamping or heavy assembly. Check the support’s capacity, stability and intended use.
Shared-garage default
A practical beginner combination is often:
- two suitable folding sawhorses;
- a replaceable top sized for the planned projects;
- one portable clamping surface or small bench;
- a defined wall location for every component.
The system should deploy without unloading the entire garage.
Dedicated-garage default
A compact bench or mobile assembly table can occupy part of the center when it leaves enough material and walking clearance. Avoid building a large permanent island before testing the layout with cardboard or temporary support.
Step 9: Store lumber without surrendering the garage
Material storage grows faster than tool storage because every offcut looks potentially useful.
Use three rules:
- Buy for identified projects.
- Separate full-length stock, sheet material and offcuts.
- Set a physical limit for each category.
Long boards
Store long stock on supports designed and mounted for the expected load. Keep boards restrained against sliding or falling. Do not place heavy material where retrieval requires reaching over a vehicle, appliance or stair.
Sheet goods
Full sheets are heavy and need controlled handling. Vertical storage must prevent tipping; horizontal storage consumes significant space. If full sheets do not fit the room or workflow, buy smaller panels or arrange suitable cutting before transport.
Offcuts
Define a minimum useful size based on real projects. Use one bin or rack with a clear capacity limit. When it is full:
- keep pieces tied to a near-term project;
- retain a small number of useful jig or test pieces;
- dispose of or recycle the remainder appropriately.
Scrap storage should not block the floor, hide outlets or create a pile that can shift.
Active-project parking
An unfinished project needs a location before it begins. Options include a labeled shelf, rolling cart or supported wall area sized for the parts.
If the project cannot be stored while the car returns, it is too large for the current shared-garage system unless it can be completed in one session.
Step 10: Control dust before the car returns
Wood dust does not remain politely at the workbench. It settles on shelves, household belongings, vehicle surfaces and the path into the home.
The Occupational Safety and Health Administration notes that airborne wood dust can affect the eyes, nose, throat and respiratory system. OSHA identifies capture at or near the source as a primary control in occupational settings.
Use a layered routine:
- Connect suitable source collection to compatible tools.
- Use filters, bags, hoses and adapters appropriate for the equipment and material.
- Clean the work surface and tool before moving it to storage.
- Vacuum floors and horizontal surfaces with appropriate equipment.
- Use task-appropriate respiratory protection when required.
- Keep the door into the house closed during dusty work where possible.
- Reset only after dust and debris are controlled.
An open garage door is useful for access and may improve air movement, but it is not a complete dust-control system.
Do not blow accumulated fine dust into the air with compressed air. OSHA’s woodworking guidance warns that compressed-air blow-down creates the type of dust cloud that presents fire and explosion hazards in industrial settings. A home shop should not intentionally aerosolize settled dust either.
Protect household storage
Do not place clean household items immediately beside sanding or cutting operations. Closed storage can reduce contamination, but it does not replace source capture and cleanup.
Food, pet supplies, children’s items and textiles do not belong unprotected in an active dust zone.
Protect the vehicle by removing it
Move the vehicle completely out of the garage before cutting, drilling, sanding or finishing. Do not use the hood, roof or trunk as storage or work support.
Before parking again:
- remove sharp debris and fasteners from the floor;
- retrieve cords, hoses and mobile bases;
- verify overhead and wall clearances;
- confirm that nothing can fall or roll into the vehicle area.
Step 11: Plan power and lighting around both garage states
Power distribution must work without turning the parking path into a cord maze.
At minimum:
- inspect outlets, plugs and cords for damage;
- preserve grounding features;
- use cords rated for the tool, load and environment;
- do not overload extension cords or power strips;
- keep cords away from blades, moisture, wheels and foot traffic;
- unplug or isolate equipment as directed before adjustments and storage;
- consult a licensed electrician about repeated breaker trips, new circuits or uncertain conditions.
The US Consumer Product Safety Commission’s home-safety guidance recommends keeping cords out of foot traffic, checking for damage and avoiding overload. Do not use temporary extension cords as permanent garage wiring.
Use two layers of light
General lighting should make the floor, shelves, doors and walking paths visible.
Task lighting should illuminate measuring, assembly and inspection without creating an unstable stand or cord crossing.
Check lighting in both states. A parked vehicle can block or reflect light differently, and a raised garage door may obstruct ceiling fixtures.
Do not install a light or storage system where garage-door movement can strike it.
Step 12: Store finishes and oily materials safely
Adhesives, finishes, solvents and fuels require more care than ordinary tool storage.
- Keep products in their original labeled containers.
- Follow the manufacturer’s storage, ventilation and disposal instructions.
- Keep incompatible materials and ignition sources separated as directed.
- Do not store products where a vehicle, moving tool or falling object can damage the container.
- Protect children and unauthorized users from access.
- Keep only quantities appropriate to real projects.
Do not leave oil-soaked rags crumpled on a bench, floor or in ordinary waste. The National Fire Protection Association warns that oily rags can start fires from self-heating and advises storing them away from heat and following community disposal guidance. Follow the specific finish instructions and local fire or waste rules.
Finishing may need to happen at a different time or location from cutting and sanding. An open door alone does not make every finish suitable for indoor use.
Sample layout 1: Garage shared with a car
This is a planning pattern, not a dimensioned blueprint.
Permanent state
Back or side wall: shallow storage for portable tools, accessories and safety equipment.
Low wall zone: mobile bench, folded work surface or nested sawhorses parked outside the vehicle envelope.
Higher wall zone: lightweight, frequently used items on properly rated supports, clear of the garage door.
Defined material zone: only stock for near-term projects, restrained and outside access paths.
Protected zones: doors, electrical equipment, appliances, controls and walking path remain clear.
Working state
- Move the car fully outside.
- Inspect and clear the floor.
- Deploy the work support into the former parking area.
- Bring out only the tool kit required for the session.
- Position extraction and power without crossing the cutting path.
- Perform one operation at a time.
- Clean each tool before returning it to the wall zone.
- Complete the full reset before parking.
The center is not storage. It is borrowed workspace.
Sample layout 2: Dedicated one-car garage
Again, this is a pattern, not a universal floor plan.
Perimeter
Use shallow cabinets or open storage for portable tools and project supplies. Place selected benchtop or stationary tools only where their operating clearances work.
Center
Use one compact fixed or mobile assembly bench. Test its position with temporary supports before committing to size.
Long axis
Preserve a clear material route through the longest part of the garage. Mobile stations may move into this route for use and return to the perimeter afterward.
Material
Use a restrained rack or cart sized to the actual project backlog. Avoid storing more sheet goods than the room can handle safely.
Cleanup
Keep extraction and cleanup equipment accessible rather than buried behind machines. A dust tool that requires ten minutes of rearrangement will be used less consistently.
Even in dedicated mode, do not create a layout that requires moving several heavy tools before every cut.
The 15-minute garage reset
A shared shop succeeds or fails at the reset.
Every loose item should have one of five destinations:
| Destination | Examples |
|---|---|
| Tools | Saw, drill, sander and hand tools |
| Accessories | Blades, bits, guides, batteries and clamps |
| Active project | Labeled shelf, cart or protected parts area |
| Material | Full stock and retained offcuts in defined storage |
| Waste and dust | Appropriate collection, recycling or disposal |
Reset sequence
- Stop work early enough to clean without rushing.
- Unplug or make tools safe according to their instructions.
- Remove accessories and inspect tools before storage.
- Put project parts in the active-project location.
- Return usable material to restrained storage.
- Handle finish materials and rags according to their instructions.
- Capture dust and remove floor debris, screws and offcuts.
- Fold or park work support outside the vehicle envelope.
- Retrieve every cord, hose and temporary light.
- Walk the parking envelope and overhead clearance before bringing the car in.
The goal is not literally 15 minutes for every shop. It is a bounded, repeatable reset. If routine cleanup takes an hour, reduce the number of deployed stations, improve destinations or reconsider the project scale.
Organization mistakes to avoid
Designing around tool footprints
Storage size is not operating size. Map the material and operator path.
Buying cabinets before measuring the car
The vehicle and door movement determine the permanent storage boundary in shared mode.
Putting everything on wheels
Mobility without parking locations creates rolling clutter. Use wheels only when the item has a stable operating state and defined storage state.
Building a full-length miter station too early
A long fixed station can consume the only useful wall and prevent the car from opening. Confirm repeated need and test a temporary setup first.
Using every inch of wall
Doors, panels, utilities and future handling space need clear areas. Empty wall can also serve as temporary material clearance.
Storing too much scrap
Set a physical limit and sort when it is reached.
Hiding cleanup equipment
The vacuum, broom or collection accessories should be easier to reach than the tool that creates the mess.
Mixing active projects with household storage
Give unfinished parts a defined location. Do not let them spread onto vehicle, stairs or appliances.
Copying a dedicated-shop layout
A one-car shop tour with a table saw, planer, jointer and permanent island may be excellent for its owner and useless for a garage that parks nightly.
One-car garage layout worksheet
Room and vehicle
| Measurement or condition | Your answer |
|---|---|
| Garage interior dimensions | |
| Ceiling and door-track height | |
| Vehicle parking position | |
| Vehicle door and hatch clearance | |
| Interior/exterior door paths | |
| Floor slope or uneven areas | |
| Longest planned material |
Protected access
| Item | Location | Required clear area marked? |
|---|---|---|
| Electrical panel | ||
| Water heater/furnace/appliance | ||
| Garage-door system | ||
| Stairs and exits | ||
| Shutoffs and controls |
Shop system
| Decision | Selected approach |
|---|---|
| Shared or dedicated mode | |
| Permanent storage wall | |
| Work-support type | |
| Work-support parking location | |
| Tool-kit storage | |
| Lumber limit | |
| Offcut limit | |
| Active-project location | |
| Dust collection and cleanup | |
| Cord and hose route | |
| Reset target |
Do not build permanent storage until the marked plan works in both parking and working states.
Bottom line
A one-car garage can be a useful beginner woodshop, including one that still parks a car. The solution is not squeezing in a complete machine collection.
Measure the vehicle and room. Protect access. Keep permanent storage shallow. Use one stable work surface. Store portable tools as complete kits. Buy material by project. Control dust before the car returns. Make the reset part of the layout—not an afterthought.
The best organized garage is not the one that stores the most. It is the one that changes safely between its real uses with the least friction.
Frequently asked questions
Can a one-car garage fit a woodworking shop and a car?
Yes, when the shop uses shallow permanent storage outside the vehicle envelope and folding or mobile work support that has a defined parking location. The vehicle should be removed during woodworking, and the garage should be cleaned and reset before it returns.
Where should the workbench go in a one-car garage?
In a shared garage, use a folding, portable or mobile bench that parks outside the vehicle envelope. In a dedicated garage, a compact central or wall bench may work if it preserves material, operator and walking clearance. Test the position before building permanently.
Should every tool be on wheels?
No. Wheels help only when the tool has a clear travel path, stable operating position and storage location. Portable hand-held tools are often better stored on shallow shelving, while frequently used mobile stations may justify locking casters.
How should I store lumber in a small garage?
Buy primarily for planned projects, separate long stock, panels and offcuts, restrain material against falling or sliding, and set a physical storage limit. Do not block doors, utilities or the vehicle path.
How do I keep sawdust off the car?
Remove the car before working, capture dust near compatible tools, vacuum the shop and horizontal surfaces, and complete the floor and overhead-clearance check before parking again. Covering the vehicle while it remains in the work zone does not solve operating-clearance or dust-control problems.
Can I use the driveway as part of the shop?
Possibly, when weather, property rules, visibility, noise, electrical safety and pedestrian access allow it. Keep material and tools off sidewalks and streets, use equipment suitable for the location and return everything to secure storage after the session.
Research method and sources
This article was researched on August 22, 2026. We reviewed current one-car and small-garage shop examples, including WOOD Magazine’s one-car Idea Shop, Fine Woodworking’s 160-square-foot shop, The Handyman’s Daughter’s small-garage organization examples and real shared-garage constraints discussed by woodworkers on Reddit.
Those sources informed the layout problems examined here. We did not treat any individual shop tour as a universal plan. Our shared-versus-dedicated framework, Parking Envelope Test and reset system were developed for this guide around the needs of beginners with limited space.
Safety references include the US Consumer Product Safety Commission Home Safety Checklist, the CPSC recall database, the Occupational Safety and Health Administration’s wood-dust overview and woodworking fire and explosion guidance, and the National Fire Protection Association’s oily-rag safety guidance.
No manufacturer supplied or reviewed this article. The Practical Woodshop did not conduct hands-on product testing or inspect a specific garage for this guide. Examples are planning patterns, not engineering drawings or code determinations. This article contains no affiliate links.